Deploy Environment for Android Map Development
Contents:
The following suggestions are all based on Windows. It should be similar on Mac.
Reference Google document from here and here.
Get map key from Google
Get package name
For Eclipse, or projects migrated from Eclipse to Android Studio, open Androidmanifast.xml and the package name is:

For Android Studio, TODO
Get SHA1 fingerprint certificate
Windows
For Eclipse, go to Windows -> Preferences -> Android -> Build to find it.
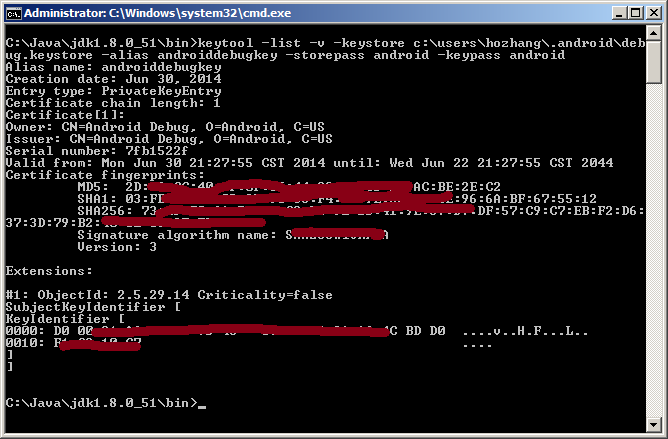
For Android Studio, go to your java(jdk) bin directory, and run:
keytool -list -v -keystore c:\users\<your_user_name>\.android\debug.keystore -alias androiddebugkey -storepass android -keypass android
You will get your SHA1 fingerprint from:
Mac
For Android Studio, go to your java home directory (/usr/libexec/), and run the following command to get SHA1 fingerprint:
keytool -list -v -keystore ~/.android/debug.keystore -alias androiddebugkey -storepass android -keypass android
Generate the key
With your package name and SHA1 fingerprint, now we can generate your key.
- Go to the Google Developers Console.
- In the sidebar on the left, select Credentials.
- If your project doesn’t already have an Android API key, create one new by selecting Add credentials -> API key -> Android key.
- In the resulting dialog, enter your app’s SHA-1 fingerprint and package name.
- Your new Android API key appears in the list of API keys for your project. An API key is a string of characters, something start with AIza, like AIzaSyBdVl-cTICSwYKrZ95SuvNw7dbMuDt1KG0.
If you want to use an existing key, open the key, and click add package name and fingerprint, and then fill your package name and fingerprint.
Add the Android API key to your application
For Eclipse, or projects migrated from Eclipse to Android Studio, in AndroidManifest.xml, add the following element as a child of the <application> element. Take the following as an example:

For Android Studio, in res/values/google_maps_api.xml, add your Android API key as the value of google_maps_key element.
Install Google Service in Genymotion VM
Genymotion is a Virtual Android Environment built on x86 and Virtualbox. It’s not an ARM emulator so it’s performance is better than the Android SDK Emulator. However in their latest update they’ve removed both ARM Translation and Google Play Apps.
Sometimes, We need the above two functions for genymotion VM. For example, to run map type apps needs Google play service.
In order to install ARM translation for Genymotion, follow these steps:
- Download the zip file from here
- Open Genymotion and go to the home screen.
- Drag and Drop the .zip file onto the Genymotion window.
- Restart Genymotion
Genymotion can now run applications that require ARM emulation.
It is similar for Google Play Apps, which can be downloaded from here
Go to How to install Google Play Services in a Genymotion VM (with no drag and drop support)? for details.
At last, Remenber to make sure that your device can connect to google server, especially when you are in China.