Android Unit Test With Junit
Create Android unit tests using junit4.
Test Types
When using Android Studio to write any of your tests, your test code must go into one of two different code directories (source sets). For each module in your project, Android Studio includes both source sets, corresponding to the following test types:
Local unit tests
Located at module-name/src/test/java/. These tests run on the local JVM and do not have access to functional Android framework APIs.
Instrumented tests
Located at module-name/src/androidTest/java/. These are all tests that must run on an Android hardware device or an Android emulator.
In the following, we will only focus on local unit test.
Set Up Your Testing Environment
In your app’s top-level build.gradle file, you need to specify these libraries as dependencies:
1 2 3 4 5 6 | |
Create a Local Unit Test Class
Manualy create junit4 unit test
Your local unit test class should be written as a JUnit 4 test class. JUnit is the most popular and widely-used unit testing framework for Java. The latest version of this framework, JUnit 4, allows you to write tests in a cleaner and more flexible way than its predecessor versions. Unlike the previous approach to Android unit testing based on JUnit 3, with JUnit 4, you do not need to extend the junit.framework.TestCase class. You also do not need to prefix your test method name with the ‘test’ keyword, or use any classes in the junit.framework or junit.extensions package.
To create a basic JUnit 4 test class, create a Java class that contains one or more test methods. A test method begins with the @Test annotation and contains the code to exercise and verify a single functionality in the component that you want to test.
1 2 3 4 5 6 7 8 9 10 11 12 13 | |
Auto create junit4 unit test with the help of Android Studio
Right click inside the class you are to test, and select Go to -> Test (Shift + Command + T), then select create new test…. You will see:
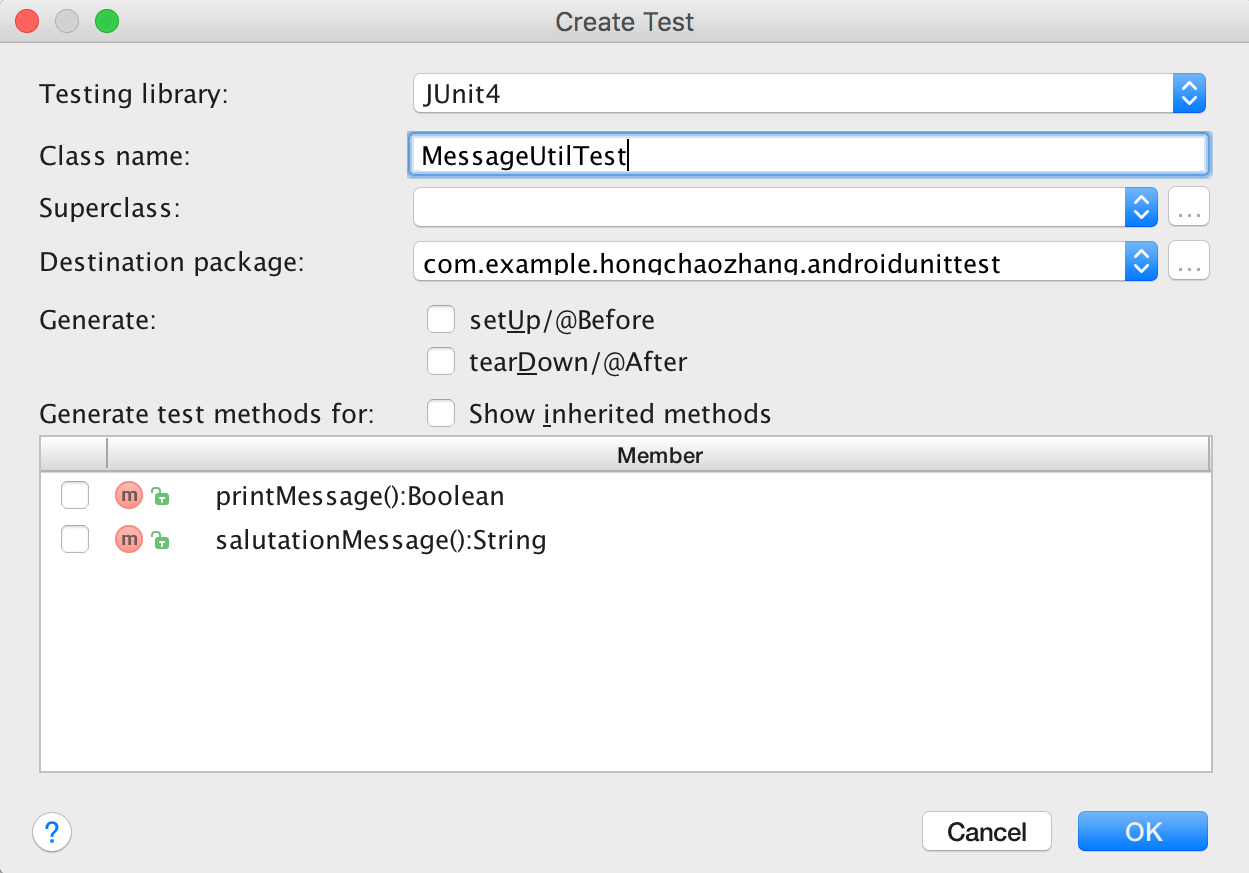
In the above window, select the test class name, the methods you want to test, and some other helper methods like setUp and tearDown.
Then fill out all the test cases.
Some annotations
| Annotation | Meaning | Note |
|---|---|---|
| @Test | for test cases | |
| @Before | excute before every test case | |
| @After | excute after every test case | |
| @BeforeClass | static, excute only once, before the first test case begin | |
| @AfterClass | see @BeforeClass | |
| @Rule |
Mock and Spy
Difference between mock and spy
Mock: Mock will wrap the Class of an Type, not from an actual instance. The mock simply creates a bare-bones shell instance of the Class. In that case, each method implementation is mocked, unless specify thenCallRealMethod() in the when(..) clause.
Spy: Spy will wrap an existing instance. In this case, all method implementation are the real one, expect if you have defined a mocked behaviour with when(..).
For mock:
1 2 3 4 | |
In that case, each method implementation is mocked, unless specify thenCallRealMethod() in the when(..) clause.
For spy:
1 2 3 4 | |
In that case, all method implementation are the real one, expect if you have defined a mocked behaviour with when(..).
There is one important pitfall when you use when(Object) with spy like in the previous example. The real method will be called (because stock.getPrice() is evaluated before when(..) at runtime). This can be a problem if your method contains logic that should not be called. You can write the previous example like this:
1 2 3 4 | |
Mock Android Dependencies
To do.
Use Hamcrest for Assertion
Use hamcrest to make the code more readable.
Instead of using:
1 2 | |
we can use:
1 2 | |
References
Getting Started with Testing: official site from Google.
Use Mockito to mock some methods but not others讲解Mock和Spy的用法,简单易懂。